Description
It is possible to fit slides to the AMC-500, and then attach the fixed part of the slide to side members in the rack onto horizontal members at the side of the rack. This will require that washers are used as spacers to bridge the distance between the slide and the rack to which it is attached.
However, a better approach is to attach the slides to the front and rear castellated rails provided for the purpose using special mounting hardware that is readily available:
The customer should order the following bar-nut and bolt kits from RS:-
580-146 Bar nuts and bolts for 19" Rack cabinet slide bracket.
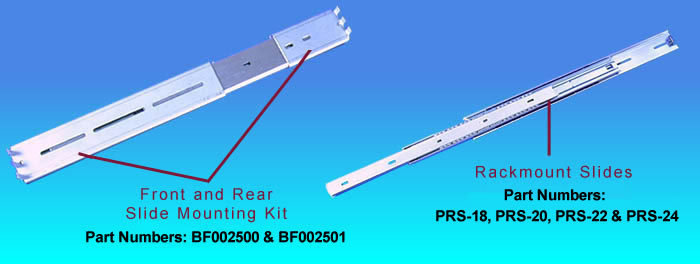
The customer also requires the standard AMC-500 Front Slide Mounting Brackets (BF002500) & Rear Slide Mounting Brackets
(BF002501) produced specifically for the purpose. These fit on the slide front and rear, and allow them to be fixed
to the chassis via the castellated strip. They have been manufactured by AMC to fit the PRS-18 Slides (BF000226),
PRS-20 Slides (BF000227), PRS-22 Slides (BF000228) and PRS-24 Slides (BF000229). To attach these brackets to the
actual slides you will also require Eight M4 x 12 cheese-head screws, washers & nuts (two per bracket).
The method of mounting the slides into the rack involves the use of a standard Vero cage nut (or equivalent - depending on rack supplier) mounted in the vertical castellated strip as usual. A 10-32 UNF bolt (supplied in the RS kit above) is then used to hold the fingers of the slide mounting bracket (front and rear). This is small enough so that it passes straight through the standard cage nut without engaging the thread on the cage nut, but does engage the thread on the Bar Nut after passing through the fingers of the slide; thus securing it in place.
Using this approach, front and back, it is a relatively easy matter to mount the slides into the system. However, it may be quite a tight fit, with the edges of the runners making contact with the sides of the castellated strip at the front of the chassis that the captive nuts screw into.
|